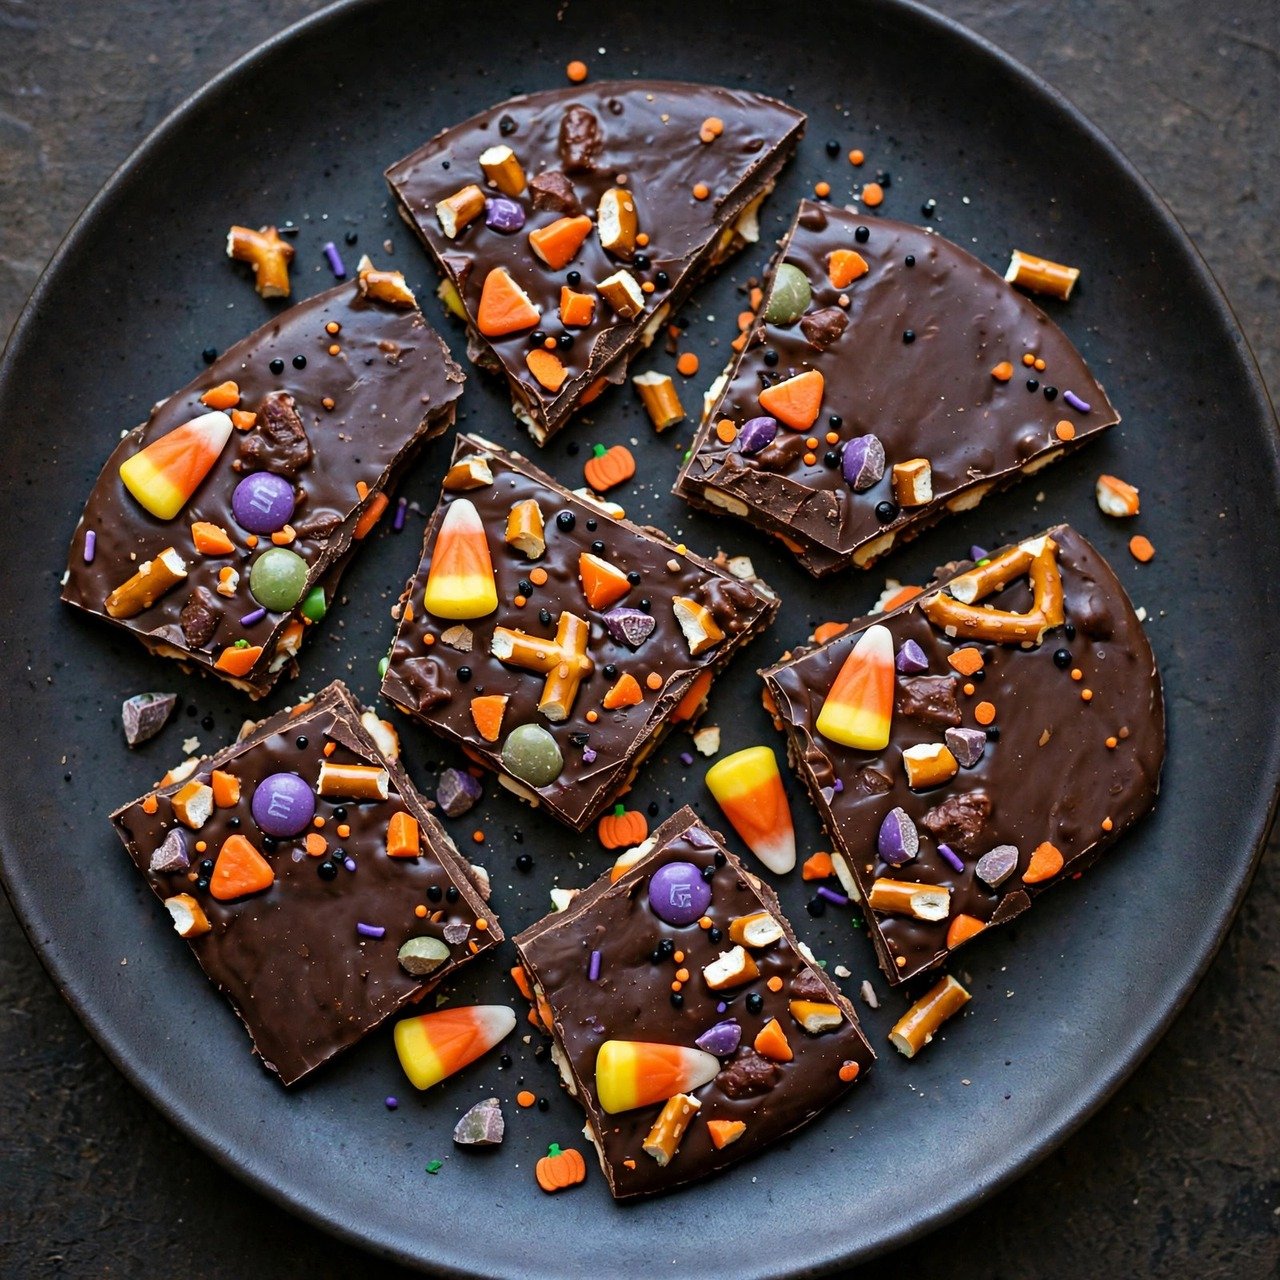
5 Halloween Candy Bark Recipes
Halloween night ends the same way in most houses: a bowl, bag, or pillowcase full of candy, and a family that is suddenly tired of eating it one piece at a time. Candy bark is the fix. Melted chocolate becomes a thin, snappy base, chopped candy becomes the topping, and in under an hour you have a shareable treat that looks like it came from a candy shop. It is also the rare Halloween recipe that gets better when you improvise, because the candy you already have is the whole point.
What sets this version apart is the chocolate itself. Instead of melting chocolate in a rush and ending up with a dull, streaky slab, the base is melted gently, spread thin, and chilled just long enough to set without blooming. A thin layer matters: at about one-quarter inch thick, the bark snaps cleanly instead of bending, and every piece gets both chocolate and candy in a single bite. Below is the hero recipe, plus four variations that use the candy most families actually bring home.
Why You’ll Love This Halloween Candy Bark
It is fast in a way most Halloween baking is not. There is no dough to chill, no frosting to pipe, and no oven time at all if you use the microwave method. From unwrapping candy to a finished slab takes about 20 minutes of active work, plus chilling.
It is also forgiving. Candy bark does not need precise measuring the way a cake does. If you add a few extra chopped peanut butter cups, the bark still sets. If your chocolate layer is a little thicker on one side, the pieces are just a little more generous there.
Most of all, it solves a real problem: the mountain of leftover candy. Rather than throwing mixed candy away or letting it go stale in a drawer, you turn it into something people actually reach for at a party, a bake sale, or a movie night.
Ingredients You’ll Need
One batch makes about 24 pieces. Use good chocolate here, because it is the main ingredient, not a background flavor.
- 12 ounces semisweet chocolate chips or chopped semisweet chocolate
- 1 teaspoon neutral oil, such as vegetable or coconut oil, optional but helpful for a clean snap
- 1 cup chopped mixed Halloween candy, such as peanut butter cups, chocolate-coated caramels, and candy-coated chocolates
- 1/4 cup crushed pretzels
- 2 tablespoons Halloween sprinkles
- Flaky sea salt, for finishing
How to Make Halloween Candy Bark
- Prepare the pan. Line a rimmed baking sheet with parchment paper, leaving an overhang on two sides so you can lift the finished slab out easily. Chop the candy into pieces no larger than a pea, so the bark cuts cleanly.
- Melt the chocolate gently. Place the chocolate in a microwave-safe bowl and heat in 30-second bursts, stirring well after each burst, until about 90 percent melted. Stir until the last pieces dissolve; the residual heat finishes the job. The chocolate should look glossy and pour in a slow ribbon, and it should not feel hot to the touch. If you prefer the stovetop, set the bowl over a pot of barely simmering water and stir until smooth, keeping all water out of the bowl.
- Spread the base. Stir in the oil if using it, then pour the chocolate onto the prepared sheet. Use an offset spatula to spread it to about one-quarter inch thick, roughly a 10 by 12 inch rectangle. Work quickly but calmly; if the chocolate starts to thicken, a few seconds of gentle warmth brings it back.
- Add the toppings. Scatter the chopped candy and crushed pretzels evenly over the surface, then press them very lightly into the chocolate so they stick without sinking. Add the sprinkles and a pinch of flaky salt. The salt matters more than it sounds: it sharpens the chocolate and keeps very sweet candy from tasting flat.
- Chill until set. Refrigerate for 30 to 45 minutes, until the slab is completely firm and cold to the touch and lifts cleanly from the parchment. Do not freeze it, which can make chocolate turn cloudy. Break or cut into irregular pieces with a sharp knife.
Tips for the Best Halloween Candy Bark Every Time
Keep water away from melting chocolate. Even a few drops can cause it to seize into a stiff, grainy lump. If that happens, the fix is counterintuitive: stir in a tablespoon of warm cream at a time until it loosens into a ganache, and use it as a drizzle instead of a bark base.
Chop candy while it is cold. Peanut butter cups and caramels cut neatly straight from the refrigerator, while warm ones smear. Let the chopped pieces sit for five minutes before scattering so they do not melt the chocolate on contact.
Do not overload the surface. A single, even layer of toppings looks better and breaks better than a thick pile. If pieces keep falling off, they were pressed in too late, after the chocolate had already started to set, so work within the first two minutes of spreading.
Easy Variations
Peanut Butter Cup Bark: Use milk chocolate as the base, top with chopped peanut butter cups and roasted peanuts, and drizzle with 1/4 cup melted peanut butter. The peanut butter drizzle should be thin enough to fall from a spoon in a line.
Caramel Apple Bark: Use white chocolate as the base, top with chopped caramel candies, dried apple pieces, and a pinch of cinnamon. The tart apple keeps the white chocolate from tasting too sweet.
Monster Mix Bark: Use dark chocolate, top with candy corn, candy-coated chocolates, and crushed chocolate sandwich cookies. This is the version kids pick first, so make a double batch for a party.
Salty Sweet Pretzel Bark: Use semisweet chocolate, top with crushed pretzels, chopped toffee bits, and flaky salt, and finish with a thin drizzle of melted white chocolate. The salt and toffee do the work here, so keep the candy light.
Storage and Reheating
Store candy bark in an airtight container at cool room temperature for up to one week, with parchment between layers so pieces do not stick. In a warm kitchen, refrigerate it instead; it keeps for up to three weeks chilled. Let refrigerated bark sit at room temperature for 10 minutes before serving so the chocolate snaps rather than shatters. Do not reheat bark, and do not leave it in a hot car or near a stove, where the toppings can melt into the base.
Frequently Asked Questions
Can I use candy melts instead of real chocolate? Yes, and they set faster and shinier, which helps for gifts. The flavor is sweeter and less complex than real chocolate, so add salt and a crunchy topping to balance it.
Why did my chocolate turn white and streaky? That is called bloom, and it usually comes from chilling too fast in the freezer or from temperature swings. It is safe to eat and still tastes fine; it just looks less glossy. Refrigerating, not freezing, prevents most of it.
Can kids help make this? Absolutely, and this is one of the best kid-friendly Halloween recipes because there is no hot oven. Let adults handle the melting, and let kids do the chopping with a butter knife and all of the decorating.
How far ahead can I make candy bark for a party? Make it up to three days ahead and keep it refrigerated in an airtight container. Break it into pieces the day you serve it so the edges stay crisp.
What candy should I avoid? Skip gummy candy and anything very chewy, like taffy, which turns hard when chilled and pulls fillings out. Hard candy is fine in small amounts, but crush it well so no large sharp pieces end up in a bite.
Nutrition Estimate
Per piece (about 1 of 24): approximately 145 calories, 8 grams fat, 17 grams carbohydrates, 2 grams protein, and 12 grams sugar. This is an estimate only, based on semisweet chocolate and a mixed-candy topping; actual values vary with the candy and chocolate you use. It is not medical or dietary advice.
The Bottom Line
Halloween candy bark turns the post-trick-or-treat pile into the treat everyone actually wants. Melt the chocolate gently, spread it thin, top it with what you already have, and chill it just until firm. It is fast, forgiving, and gone quickly, which is exactly what a Halloween recipe should be.