5 Graveyard Dirt Cup Recipes
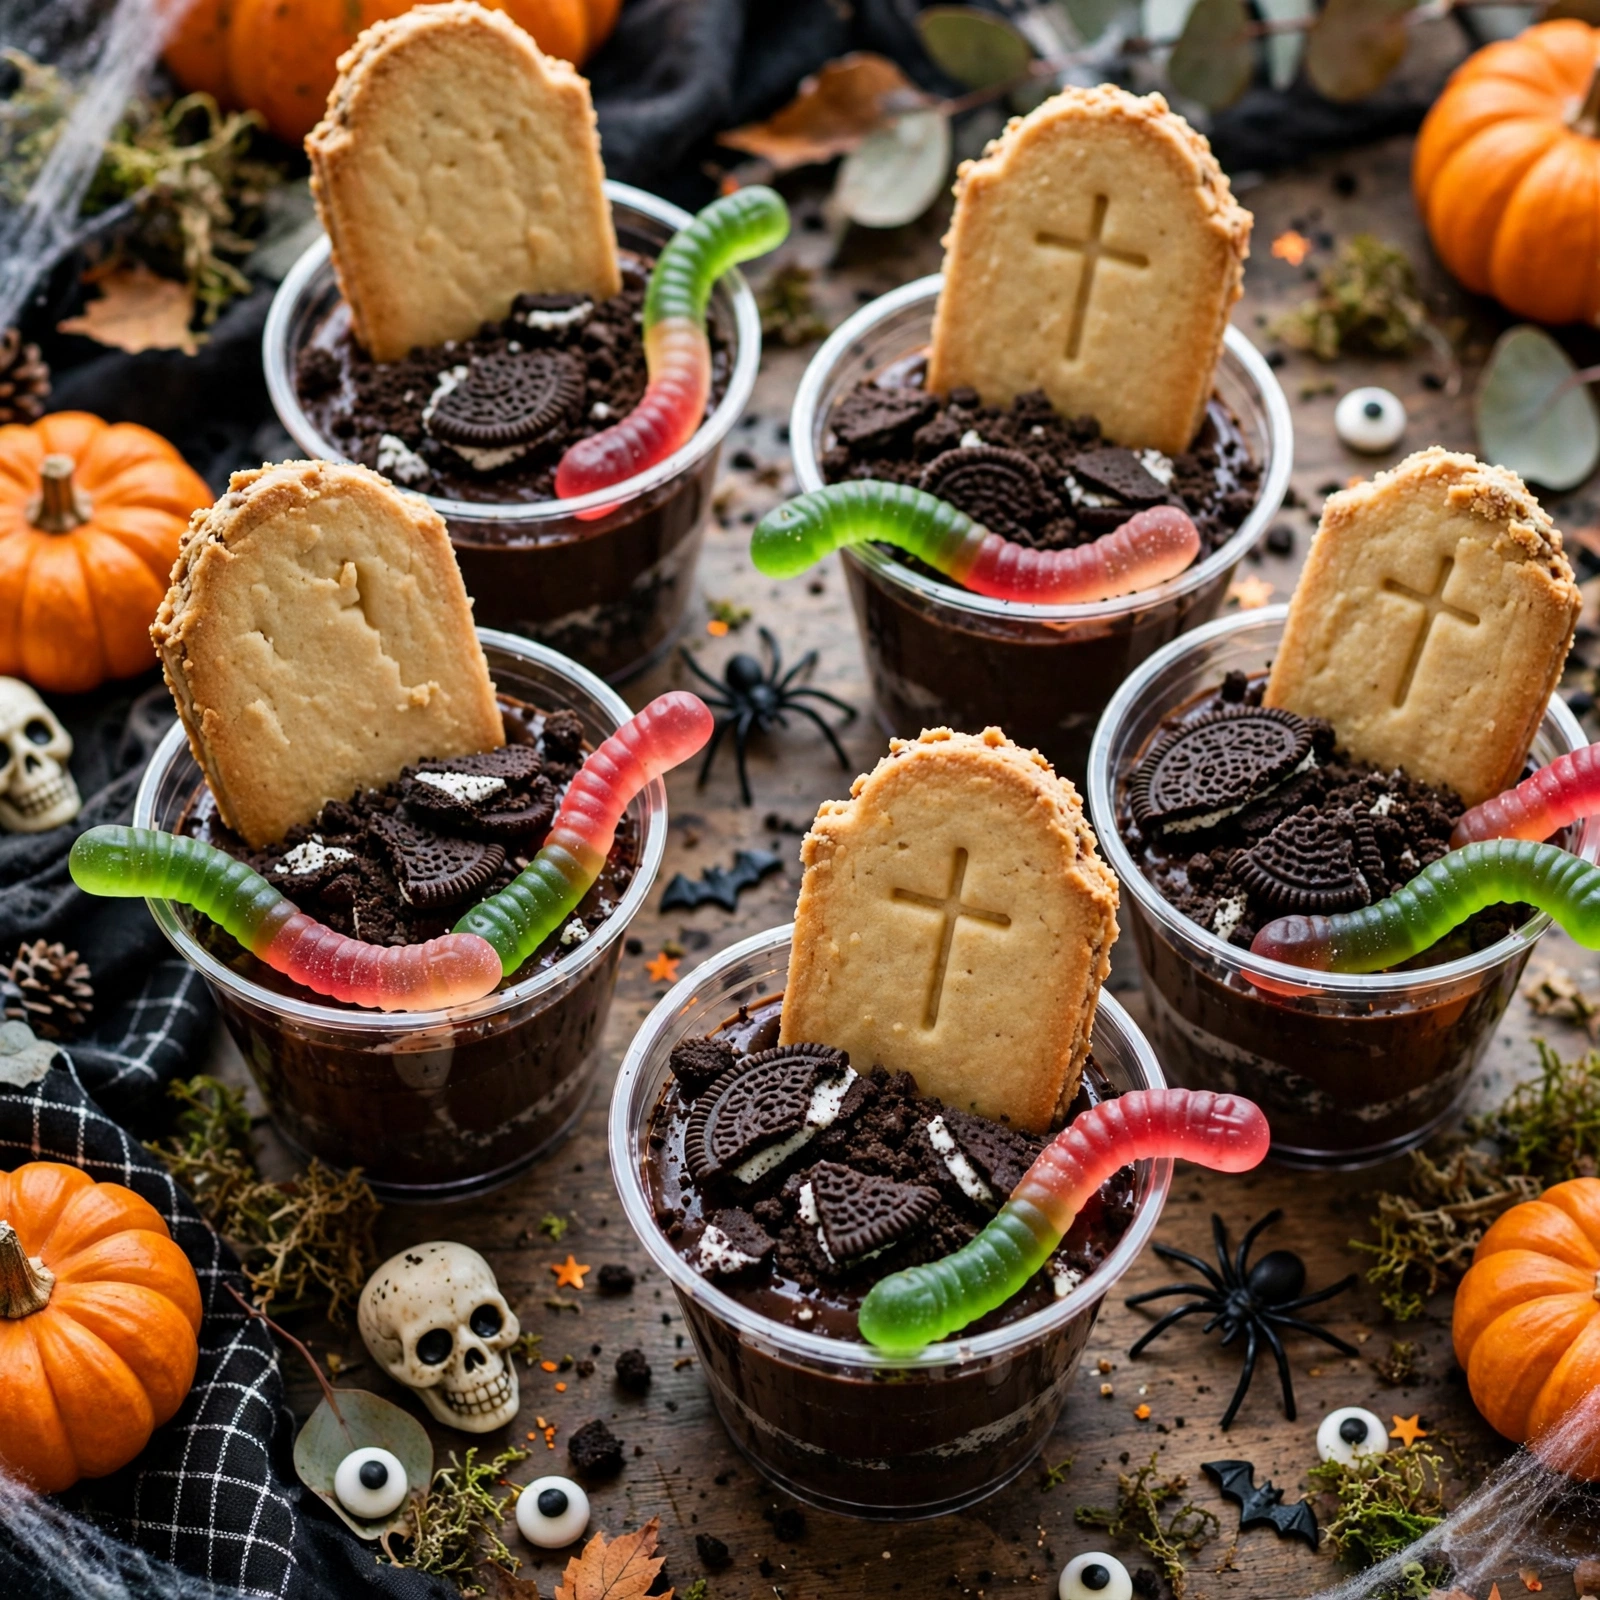
Graveyard dirt cups are the Halloween dessert that never needs an oven, never fails a crowd, and never stays on the table for long. Layers of rich chocolate pudding, whipped cream, and crushed chocolate cookies are stacked in clear cups, then crowned with a cookie tombstone and gummy worms peeking out of the “dirt.”
What makes this version special is the method behind the fun. The pudding is chilled until it sets firm, the cookie crumbs are crushed to two textures for a realistic dirt effect, and the layers are built in a specific order so every spoonful gets cream, crunch, and chocolate.
Why You’ll Love This Graveyard Dirt Cups
First, they are fast. The base comes together in about twenty minutes of hands-on time, and the refrigerator does the rest. There is no baking, no candy thermometer, and no piping skill required, which makes them a perfect project for kids and a low-stress option for busy party hosts.
Second, they are endlessly adaptable. Serve them in small clear cups for a classroom party, in mason jars for a spooky dinner table, or in one big glass trifle bowl as a centerpiece.
Ingredients You’ll Need
This base recipe makes 8 servings in 8-ounce clear cups. You will need:
- 2 boxes (3.9 ounces each) instant chocolate pudding mix
- 3 cups cold whole milk
- 1 cup heavy whipping cream
- 2 tablespoons powdered sugar
- 1 teaspoon vanilla extract
- 1 package (14.3 ounces) chocolate sandwich cookies
- 8 rectangular or oval shortbread cookies, for tombstones
- 1/4 cup chocolate frosting or melted chocolate, for decorating tombstones
- 16 gummy worms
- 1/2 cup candy pumpkins or candy bones, optional
Cookie choice matters more than it seems. Classic chocolate sandwich cookies give the darkest, most realistic “dirt,” and their cream filling adds richness when crushed in. If you use plain chocolate wafers instead, add a tablespoon of melted butter to help the crumbs clump.
How to Make Graveyard Dirt Cups
- Make the pudding first. Whisk both boxes of pudding mix with 3 cups of cold whole milk in a large bowl for 2 minutes, until thickened and smooth. Cover and refrigerate for at least 30 minutes. This chill is not optional: warm, unset pudding will slump under the cookie layers and turn the cup muddy instead of layered.
- While the pudding chills, crush the cookies. Place the chocolate sandwich cookies in a zip-top bag and crush with a rolling pin until you have a mix of fine crumbs and pea-sized pieces. You want both textures: fine crumbs read as soil, while the larger bits give crunch.
- Whip the cream. In a chilled bowl, beat 1 cup of heavy cream with 2 tablespoons of powdered sugar and 1 teaspoon of vanilla on medium-high speed for 2 to 3 minutes, until soft peaks form. Stop as soon as the peaks flop softly; overwhipped cream turns grainy.
- Fold half of the whipped cream into the chilled pudding with a spatula, using wide, gentle strokes until just combined. This lightens the pudding into a mousse-like layer that still holds its shape. Keep the remaining whipped cream for the top layer.
- Build the cups. Spoon 2 tablespoons of cookie crumbs into the bottom of each cup, then add 1/3 cup of the pudding mixture, then 2 tablespoons of crumbs, then another 1/3 cup of pudding. Finish with a generous dollop of the reserved whipped cream and a thick blanket of crumbs on top, so the surface looks like freshly turned earth.
- Decorate the tombstones. Pipe “RIP” or a simple cross onto each shortbread cookie using chocolate frosting in a zip-top bag with a tiny corner snipped off. Let them set for 5 minutes so the writing does not smear.
- Assemble the graveyards. Press one tombstone cookie upright into the back of each cup, angled slightly for a crooked, haunted look. Tuck 2 gummy worms halfway into the crumbs so they look like they are crawling out of the dirt.
- Chill the finished cups for at least 1 hour before serving, and up to overnight. This final chill lets the cookie crumbs soften just enough to eat with a spoon while still keeping their crunch, and firms the pudding so the layers scoop cleanly.
Why chill twice? Pudding sets through starch gelatinization, which needs cold and time to firm up fully. The second chill lets moisture from the pudding migrate slowly into the crumbs, softening them without turning them to mush.
Tips for the Best Graveyard Dirt Cups Every Time
Do not use skim milk for the pudding. Instant pudding needs the fat in whole milk to set thick and creamy; skim milk produces a thin, watery layer. If you only have low-fat milk, reduce it to 2 3/4 cups to compensate.
If your pudding turns lumpy, do not start over. Press it through a fine-mesh strainer with a spatula, or whisk it vigorously for another minute; most lumps are just undissolved mix. If the whipped cream deflates when folded in, the pudding was probably still warm: chill it longer next time.
Cups that look messy are usually cups that were layered too fast. Wipe the inside rim of each cup with a damp paper towel after filling, and spoon each layer gently against the side so the stripes stay visible through the glass.
Easy Variations
1. Classic Graveyard Dirt Cups. The base recipe as written: chocolate pudding, whipped cream, crushed chocolate sandwich cookies, a shortbread tombstone, and gummy worms.
2. Peanut Butter Graveyard Cups. Whisk 1/2 cup of creamy peanut butter into the pudding before chilling, and swap the top crumbs for crushed peanut butter cup candies. The peanut butter makes the pudding extra thick. Flag this clearly for guests with nut allergies.
3. Mint Chocolate Haunted Cups. Use mint chocolate sandwich cookies for the crumbs and stir 1/2 teaspoon of peppermint extract into the whipped cream.
4. Caramel Toffee Cemetery Cups. Drizzle 2 tablespoons of caramel sauce between the pudding layers and top with 1/4 cup of crushed toffee bits. The caramel seeps into the crumbs as the cups chill, creating gooey pockets. A pinch of flaky sea salt on top balances the sweetness.
5. Cookies-and-Cream Ghost Cups. Replace the chocolate pudding with vanilla pudding and use only crushed chocolate cookies for the layers, so the cups look pale and ghostly. Top with a white chocolate ghost-shaped cookie instead of a tombstone.
Storage and Reheating
Store dirt cups covered in the refrigerator for up to 3 days. The crumbs will soften over time, which most people enjoy, but after day three the texture turns soggy. If you are making them ahead for a party, assemble the cups without the tombstones and worms, then decorate within a few hours of serving so the cookies stay crisp.
Do not freeze dirt cups. Freezing breaks the pudding’s structure and turns it watery when thawed, and the whipped cream separates. These are served cold; if cups feel too firm straight from the refrigerator, let them sit at room temperature for 10 to 15 minutes before serving.
Frequently Asked Questions
Can I use cook-and-serve pudding instead of instant? Yes, but it changes the timing. Cook-and-serve pudding must be heated on the stove until it boils, then cooled completely before layering, which adds about an hour.
Why are my layers mixing together? Usually the pudding was not chilled long enough. Chill it a full 30 minutes until it holds its shape on a spoon, and spoon each layer gently instead of pouring it in.
Can I make dirt cups ahead of time? Absolutely. They taste better after an overnight chill, because the flavors meld and the crumbs soften to the perfect texture. Assemble up to 24 hours ahead and add the tombstones and gummy worms just before serving.
Are dirt cups safe for a nut-free party? The classic, mint, caramel toffee, and cookies-and-cream versions are nut-free as long as your cookies, pudding, and candies come from a nut-free facility. Skip the peanut butter variation for nut-free gatherings.
Can I make this dairy-free? Yes, with swaps. Use a dairy-free instant pudding mix, oat or almond milk (reduce to 2 3/4 cups so it sets firmly), and coconut whipped cream from a chilled can of coconut cream.
Nutrition Estimate
Per cup (8 servings, classic version): approximately 420 calories, 19 grams of fat, 58 grams of carbohydrates, 5 grams of protein, and 38 grams of sugar. This is an estimate only; actual numbers vary with cookie brand, pudding mix, and portion size. General guidance only, not medical or dietary advice.
The Bottom Line
Graveyard dirt cups prove that the best Halloween desserts do not need an oven or a baking degree. A bowl of pudding, a bag of cookies, and a little patience in the refrigerator turn into a dessert that looks like a tiny haunted cemetery and tastes like pure nostalgia. Master the double chill, the two-texture crumbs, and the gentle layering, and these five variations will carry you through classroom parties and spooky movie nights.